I’ve found that most bunk room designs fail because they ignore the foundational question: how do you maximize usable floor space while accommodating multiple sleepers?
The answer isn’t about cramming in furniture; it’s about strategic placement. When you anchor bunks to walls, keep your central circulation clear, and integrate storage beneath beds, you’re creating a room that functions properly.
There is, however, a specific approach to configurations and finishes that separates mature, functional spaces from cluttered afterthoughts.
Start With Your Space: Measure Mattresses and Clearance

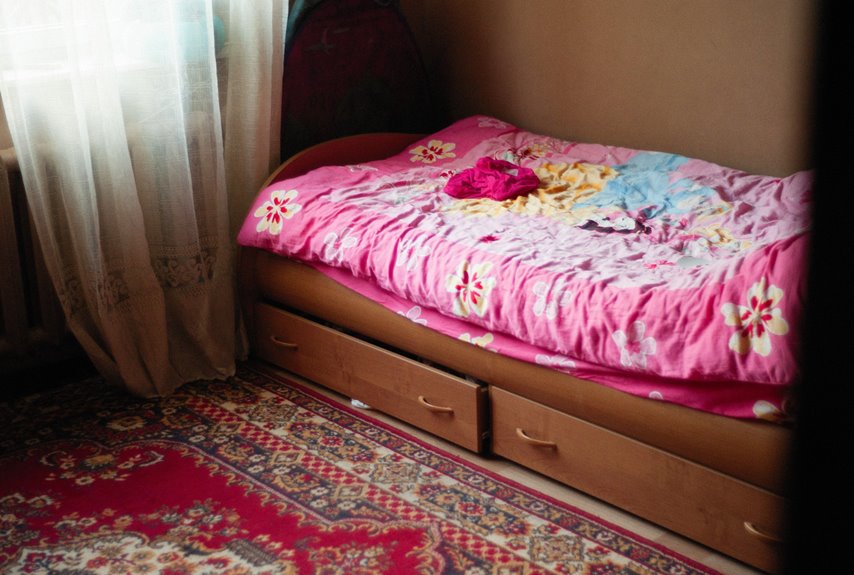
Why do so many bunk room layouts fail before construction even begins? Most people skip the measurement phase entirely. Taking time to measure your mattresses and account for proper mattress clearance significantly impacts space optimization. You’ll want to add 2–4 inches of clearance around all sides of each mattress to allow comfortable bed-making and ventilation. Next, map your exact bunk dimensions on a floor plan, including negative space around the mattresses for walking paths and ladder access. Don’t forget to account for blanket thickness and bed frame slat depth. These concrete measurements prevent costly mistakes and confirm your bunk configuration fits comfortably within your room’s ceiling height and floor dimensions.
Design Floor Plans That Keep Central Space Open

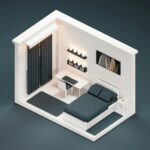
How you arrange your bunks determines whether your room feels cramped or open. The solution lies in strategic wall placement. Position bunk beds parallel to walls, anchoring them firmly against structural surfaces rather than floating them in the middle of your space. This floor plan approach creates a clear central corridor for circulation while six occupants maintain comfortable left-right spacing throughout the room.
Built-in lockers along the window wall and drawers beneath lower bunks eliminate clutter that typically consumes floor area. Account for practical bed-making clearance by measuring blanket thickness and frame width, ensuring you can actually move around each bunk bed without obstruction. A ceiling fan overhead optimizes airflow without intruding into your newly liberated central space, completing an efficient layout that prioritizes both function and openness.
Integrate Storage: Lockers, Drawers, and Built-Ins

Strategic storage integration makes a bunk room functional and organized through built-in solutions rather than freestanding furniture, which truly maximizes available square footage. Position lockers along the window wall and install drawers beneath lower bunks, creating nested storage that doesn’t consume floor area. These built-ins anchor the room’s organization system while preserving open sightlines for activities and conversation.
Pull-out solutions slide covertly under bunks, keeping daily clutter invisible yet accessible from each sleeping level. Integrated shelving and cabinets work harder than standalone pieces because they adapt alongside life changes; graduations, roommate transitions, or expanding families all require flexible storage solutions. When you design storage with practical access in mind, you establish safer circulation patterns and ensure everyone knows exactly where their belongings belong.
Choose Your Bunk Configuration: Queen/Twin vs. King vs. Suspended

I’ll help you select the right bunk configuration by weighing three distinct approaches that balance capacity, comfort, and aesthetics. A Queen/Twin combination, placing a full Queen on the bottom with a Twin mounted above, delivers flexible sleeping options for vacation homes while preserving dresser space and stair access underneath. King-size bunk beds serve taller guests and support weight capacities up to 2,000 lbs, though they consume more floor area. Suspended bunk designs create a contemporary visual anchor and reclaim square footage for circulation and activities, but they require careful planning for safety railings, built-in ladders, and accessibility during bed-making.
Queen/Twin Space Efficiency
When you’re designing a bunk room that’ll serve multiple guests with varying needs, a mixed-size configuration makes practical sense. Queen/Twin setups deliver solid space efficiency by pairing a full-size Queen mattress (60″ × 80″) on the bottom with a Twin (38″ × 75″) on top. This bunk configuration accommodates different sleeping preferences without consuming extra square footage.
These arrangements work particularly well in guest rooms where you host families alongside solo travelers. The Queen provides comfort for couples or individuals preferring spacious sleeping areas, while the Twin serves children or single adults. Sturdy ladders with reinforced railings enhance both safety and accessibility across age groups.
This flexibility means you’re maximizing your room’s potential. You’re not choosing between guest types; you’re welcoming everyone.
King Size Comfort Benefits
Comfort takes center stage when you’re considering King-sized bunks for your guest room, especially if you’re hosting adult visitors or families who’ll occupy the space for extended periods. King size bunks support up to 2,000 pounds each, accommodating taller sleepers without compromise. This space optimization approach pairs a King bottom with a Twin or Queen top, creating versatile configurations for mixed-age guests. You’ll notice the extra legroom reduces crowding sensations in high-traffic shared rooms. For your bunk room design, elevated King configurations preserve floor circulation while delivering visual impact. The stability and roominess make extended stays comfortable rather than cramped. When adults need accommodation alongside children, King bunks address privacy concerns at the same time. Your space becomes a welcoming environment where everyone rests well.
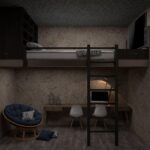
Suspended Bed Modern Appeal
How do you transform a functional sleeping arrangement into an architectural statement? A suspended bed delivers exactly that: modern appeal through intentional elevation. This configuration maximizes floor space while establishing a dramatic focal point that anchors your entire room design.
| Feature | Queen/Twin Mix | King Suspended | Benefits |
|---|---|---|---|
| Capacity | Standard sleepers | Taller/heavier guests | 2,000 lbs per bunk |
| Floor Space | Moderate clearance | Maximum circulation | Seating areas possible |
| Aesthetic | Versatile | Bold statement | Contemporary impact |
| Load Requirements | Standard supports | Heavy-duty structure | Ceiling integration critical |
Industrial-grade railings and robust ladders serve as both safety features and design elements that enhance the suspended bed’s modern appeal. Pair these with restrained finishes and integrated lighting to achieve sophisticated space maximization suitable for adult guests and family environments alike.
Install Wall Lights and Independent Outlets for Every Bunk

Installing plug-in wall sconces beside each bunk, paired with independent outlets positioned near headboards, eliminates shared power strip clutter while delivering personalized reading light. Position these fixtures to minimize glare when occupants lie down by angling them slightly downward at 15-20 degrees and choosing warm color temperatures (2700K) that won’t disrupt late sleepers’ circadian rhythms.
Wired-in or USB-enabled outlets near each headboard accommodate phones, tablets, and nightlights simultaneously. Dimmable sconces in finishes like brushed nickel or matte black create a cohesive, mature aesthetic that balances functionality with visual harmony across the room.
Individual Lighting Per Bunk
When furnishing a shared bunk room, individual lighting reduces nighttime interruption and supports each occupant’s independence. Plug-in wall sconces mounted beside each bunk eliminate the need for bulky floor lamps while providing dedicated bunk lighting that won’t disturb roommates.
Strategic placement matters significantly:
- Position sconces on the headboard area to minimize shadows and enhance reading comfort
- Install dimmable, warm-white fixtures that create a cohesive atmosphere without glare
- Pair individual lighting with USB charging outlets to consolidate cord management and device access
Accessibility proves important as well. Switches and outlets should be reachable from ladder access points, preventing disruption when entering or exiting bunks. This thoughtful approach to individual lighting allows shared spaces to function as personal retreats where each person maintains control over their environment without compromise.
Electrical Outlet Accessibility Matters
Why do shared bunk rooms often suffer from tangled cords and limited charging space? The answer lies in poor outlet accessibility. Installing independent charging stations at each bunk eliminates device-sharing conflicts entirely. Place outlets at bedside level for lamps and fans, then add lower outlets for under-bed charging cords. This multi-height approach prevents safety hazards while accommodating various needs.
A built-in power plan integrated into your ceiling or wall junction box simplifies wiring logistics. Include both USB-C and standard 120V outlets in each bunk area to support modern devices. Pair plug-in wall sconces beside beds with accessible outlets, delivering targeted reading light without surface clutter. This strategic electrical design makes bunk rooms functional and organized spaces where every occupant enjoys independent device access.
Modern Design Touches for Bunk Rooms: Accents That Mature Well

How do you design a bunk room that works for an eight-year-old and remains compelling at sixteen? The answer lies in selecting mature finishes that transcend age-driven trends. I recommend anchoring your space-saving bunk rooms with these foundational elements:
- Hand-painted motifs in muted palettes (soft grays, warm ochres, or navy accents) that evoke early 20th-century design without feeling juvenile
- Built-in furnishings with integrated desks and concealed storage, eliminating visual clutter while supporting evolving needs
- Statement lighting fixtures and custom railings with rippled details that signal thoughtful craftsmanship
Warm wood tones paired with neutral fabrics create versatility. Incorporate refined accents sparingly; a subtle ship-cabin theme works when balanced against sophisticated decor. This approach keeps your bunk rooms functional and visually interesting throughout your child’s adolescence, avoiding costly redesigns while maintaining practical elegance.
Divide Space With Privacy Curtains and Personal Zones

Sophisticated bunk rooms thrive when occupants can claim their own territory without sacrificing the room’s mature aesthetic. Privacy curtains create personal zones effectively, delineating sleeping areas while maintaining clear circulation paths.
| Curtain Feature | Material | Color Palette | Installation |
|---|---|---|---|
| Rod Type | Aluminum or steel | Matte black or brushed nickel | Ceiling-mounted |
| Fabric Weight | Linen blend or canvas | Neutral grays, whites | Simple brackets |
| Hem Length | Floor-grazing or knee-high | Coordinating tones | Velcro or clips |
| Access Points | Tied-back sides | Room-matching scheme | Storage-friendly |
Simple rods paired with neutral fabrics prevent visual overwhelm. Curtains should accommodate easy access to storage and lighting controls without obstruction. This space division approach maintains sophistication while establishing distinct personal zones; it accomplishes these goals without requiring major furniture repositioning.
Design Your Bunk Room for Growth: Future-Proofing Your Layout

When you’re designing a bunk room that’ll serve your family through multiple life stages, you’re fundamentally building flexibility into the architecture itself. Future-proofing your layout means selecting modular design elements that adapt without structural overhauls.
Building flexibility into your bunk room architecture ensures it adapts through every life stage without costly structural changes.
- Install built-in storage with adjustable shelving and drawer systems beneath lower bunks. This allows you to reconfigure organization as children’s needs shift from toys to textbooks to sports equipment.
- Choose neutral finishes in durable warm woods paired with versatile fabrics that age gracefully and coordinate with evolving décor preferences.
- Incorporate multi-use zones featuring pull-out lounging areas or built-in desks. These transition from homework stations to remote work spaces as your family’s needs change.
This approach keeps your investment relevant through graduations, sleepovers, and the years beyond.
Safety and Ventilation: Non-Negotiable Bunk Room Essentials

Why do most bunk room designs fail within five years? They neglect ventilation and safety, the foundational requirements that determine whether shared sleeping spaces truly function. I’ve found that installing ceiling fans strategically positioned away from top bunks dramatically improves airflow in compact areas. Cross-ventilation matters tremendously; you’ll want unobstructed pathways that allow air to circulate freely, preventing stuffiness that accumulates when bodies share tight quarters.
Your space-maximization efforts shouldn’t compromise egress routes. Position ladders and railings to maintain clear circulation patterns. I recommend non-toxic, low-VOC finishes and breathable fabrics. These choices preserve air quality when occupancy density increases.
Safety requires intentional planning. Keep ventilation openings unobstructed by furniture or curtains. This approach creates bunk rooms that function as sustainable, healthy environments where occupants genuinely feel secure and comfortable.