Your kitchen extension could literally double your living space if you know where to start. I’m here to show you how strategic design choices create spacious, light-filled rooms from cramped cooking zones. From floor-to-ceiling glass installations to clever 3-foot cantilevers that steal square footage, we’ll explore the moves that maximize every inch.
Before you break ground, understanding permits and budgets separates smart renovations from costly mistakes.
Design for Light: Windows, Skylights, and Glass Doors

How do you create a kitchen extension that feels open and luminous instead of dark and confined? Strategic glazing decisions are essential. Expansive glazing through large picture windows and bi-fold doors floods your extension with natural light while creating seamless indoor-outdoor connections. Skylights positioned above work zones bring daylight from above, brightening prep areas and countertops without requiring wall space.
High-level glazing maintains privacy while maximizing illumination. A layered glazing strategy that combines multiple window types offers a balanced approach: it controls heat gain while establishing sightlines throughout. Glass doors function as both functional elements and visual anchors. Material selections and color accents further harmonize with incoming light, defining distinct zones within your extension.
This comprehensive approach creates a kitchen extension that feels connected and welcoming.
Get More Space on a Tight Budget: Cantilevers and Bump-Outs

When you’re working with a cramped kitchen, structural extensions don’t always require a full addition. Cantilevers and bump-outs offer targeted solutions that maximize usable square footage without the expense of major construction.
A 3-foot cantilever expands your wall for wall-to-wall cabinetry while maintaining a compact footprint. The Window Box Bump-out pushes glazing outward, creating deep sills perfect for an indoor herb garden or breakfast bar. The Pantry Push dedicates space for walk-in storage, relocating bulky items and improving organization. An Appliance Niche recesses your refrigerator flush with cabinetry, widening walkways and maintaining uninterrupted sightlines.
These kitchen extension strategies increase storage capacity and enhance workflow by reducing disturbance to existing structural elements, making them practical investments for space maximization.
Rethink Your Kitchen Extension Layout: Islands, Pantries, and Workflow

Why settle for a fragmented kitchen layout when strategic extensions can reorganize your entire workspace? An island creates a central hub in your U-shaped kitchen, delivering seating, storage, and expanded counter space that streamlines workflow. A pantry bump-out relocates bulky appliances, your fridge and ovens, outside the main footprint, immediately enlarging the kitchen while improving organization.
Meanwhile, a 3-foot side extension reclaims wall space for wall-to-wall cabinetry, maximizing storage without structural disruption. A shallow appliance niche recesses your refrigerator flush with cabinetry, widening walkways and maintaining clean sightlines. Each kitchen extension decision directly impacts light, efficiency, and how you move through the space, creating the organized layout you’ve been wanting.
Connect Your Indoor and Outdoor Spaces

Where’s the real value in extending your kitchen if you’re not utilizing the connection to your outdoor environment? Bi-fold and sliding doors create genuine indoor-outdoor flow, changing how you inhabit both spaces. Full-height glass patio doors maximize natural light while framing garden views as living focal points.
Installing matching flooring, whether porcelain tile or composite decking, establishes interior-exterior continuity that expands perceived square footage. Retractable wall systems enable year-round use, accommodating seasonal shifts without compromising the seamless transition between kitchen and terrace.
Position outdoor dining directly adjacent to your extension, integrating garden activities into daily routines. This strategic garden integration doesn’t merely add square footage; it fundamentally reshapes how your household functions, creating unified living zones that respond to both weather and occasion.
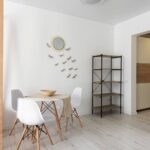
Flooring, Mirrors, and Integrated Appliances: Three Tricks That Enlarge Your Space

How do you make a modest extension feel substantially larger than its actual footprint? Three design strategies work together: continuous flooring, mirrored surfaces, and integrated appliances.
Continuous flooring across your extension eliminates visual thresholds, creating a seamless connection that unifies the existing kitchen and new area. This unified approach enhances the open feel without adding square footage.
Continuous flooring eliminates visual thresholds, creating seamless kitchen connections that enhance openness without adding square footage.
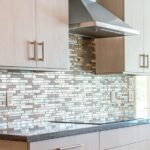
Mirrored backsplashes using antique mirror or reflective glass bounce light throughout tight layouts, doubling your space perception. These reflective surfaces strategically positioned amplify brightness and depth.
Integrated appliances blend seamlessly with cabinetry, reducing clutter that fragments visual space. Panel-ready designs maintain unified finishes while preserving the impression of a larger footprint.
Selecting durable, easy-to-clean materials supports this unified aesthetic. Together, these elements make modest extensions into spacious, welcoming kitchens that feel generously proportioned.
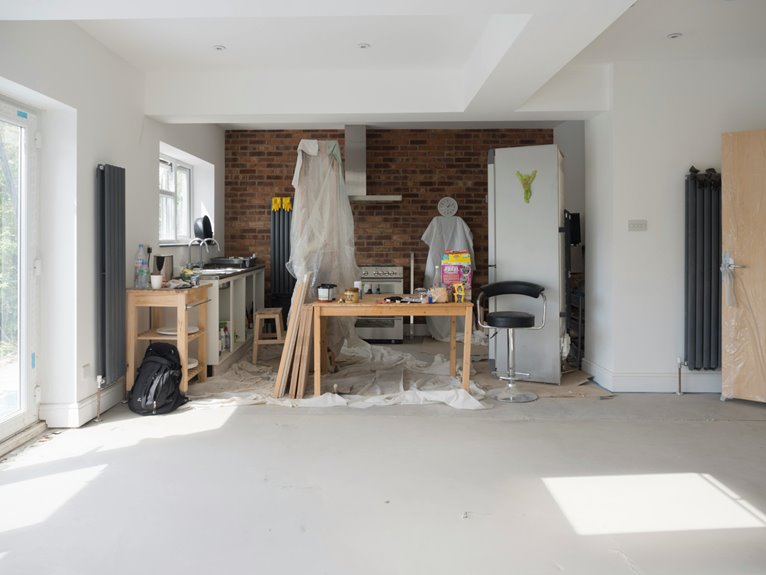
Size, Budget, and Permits: What to Plan First

Before you sketch your dream kitchen extension, I need you to nail down three critical decisions: your extension’s footprint size, which directly determines foundation and roofing costs, along with the structural complexity you’re willing to tackle. Local zoning requirements and setback regulations vary greatly by municipality, so I recommend consulting your city’s planning department early. This step prevents costly redesigns after permits are denied.
Understanding your budget’s flexibility on structural elements, tie-ins to existing systems, and finish selections will help you decide whether a modest bump-out or a larger open-concept addition makes financial sense for your space and lifestyle.
Determining Your Extension Footprint
The dimensions you choose for your kitchen extension will ripple through every aspect of your project, from the foundation’s concrete specifications to the final permit approval. This is the foundational decision that shapes both feasibility and cost.
Your extension footprint directly determines construction expenses. Consider these critical factors:
- Foundation and roofing costs increase proportionally with square footage, so each additional foot impacts your overall budget planning
- Open concept layouts connect kitchen and living areas efficiently, maximizing usable space within your footprint constraints
- Tie-in planning requires precise measurements for system integration, affecting permit feasibility and foundation needs
Early space planning distinguishes between structural complexity and finish selections. I recommend consulting NorthCo for feasibility work before finalizing dimensions. They’ll assess permit requirements and cost variance factors specific to your kitchen extension, so your footprint aligns with realistic budget parameters.
Understanding Local Zoning Requirements
Once you’ve settled on your extension’s footprint, you’ll need to understand how local zoning regulations will shape what’s actually buildable on your property. City of Ottawa rules govern setbacks, height restrictions, and site coverage limits that directly impact your design. Zoning reviews examine how your extension affects neighbours’ sightlines, privacy, and overall neighbourhood character.
Small bump-out extensions often require less permitting complexity than full rear additions, particularly near property boundaries. Early professional guidance is invaluable here; an architect or contractor familiar with permit processes can identify feasibility issues before you invest in detailed plans. They’ll navigate setback requirements and verify your footprint complies with local regulations.
This strategic approach optimizes your budget by preventing costly redesigns and streamlining the permitting timeline significantly.
Budgeting For Structural Complexity
How does your extension’s footprint translate into actual construction costs? Larger square footage directly increases extension cost through expanded foundation, roofing, and system tie-ins. I recommend conducting an early feasibility study to identify permit requirements and structural complexity before finalizing design.
Your budget planning should address:
- Foundation demands: Deeper footings and larger concrete pours escalate costs proportionally with extension size
- Open concept integration: Connecting kitchen to living areas requires additional structural framing and HVAC tie-ins
- Finishing quality impact: Material selections and system complexity create substantial budget variability
Balancing your footprint against functional needs helps you maximize usable space without overspending. Structural complexity varies significantly based on roof pitch, wall configurations, and utility connections.
Early planning guides realistic cost expectations and prevents costly mid-project modifications.