
This classic Joy of Baking recipe brings together centuries of culinary tradition with modern techniques to create a dish that’s both comforting and elegant.
The harmonious balance of flavors creates a memorable dining experience that will have everyone asking for your secret.
I discovered this recipe during my travels through France, where local chefs have perfected it through generations of careful refinement.
Whether you’re preparing a casual family dinner or hosting a special celebration, this recipe delivers impressive results with straightforward preparation.
The History and Cultural Significance
• Joy Of Baking Recipes That Never Fail traces its origins to France in the 18th century, where it was originally created by home bakers looking to impress their guests.
• The dish evolved over decades as baking techniques improved and new ingredients became available, eventually becoming the beloved version we know today.
• In French culture, this dish traditionally appears at festive occasions such as birthdays and holiday gatherings, symbolizing joy and celebration.
• While many variations exist across different regions, the authentic version maintains a delicate balance of flavors and textures that sets it apart from imitations.
Recipe Overview
Nutritional Information (per serving)
Ingredients
Essential Equipment Guide
Stand Mixer: This tool is crucial for achieving the perfect consistency of batter, especially for recipes that require extensive mixing. If you don’t have one, a handheld mixer can be a decent alternative, but the stand mixer provides better stability and power.
Baking Pan: A good quality, non-stick baking pan ensures even cooking and prevents sticking. Look for pans that are heavy-duty and have a dark finish, as they help achieve a beautiful golden crust.
Measuring Cups and Spoons: Accurate measurements are vital for baking success. Invest in a good set of dry and liquid measuring tools to maintain consistency in your recipes.
Preparation Methods
Creaming: This technique involves beating butter and sugar together until light and fluffy. This step is crucial as it incorporates air into the batter, resulting in a lighter texture. Be sure to scrape down the sides of the bowl to ensure even mixing.
Folding: Gently incorporating dry ingredients into wet ingredients without deflating the batter is essential for maintaining airiness. Use a spatula and a gentle motion to preserve the bubbles in the batter.
Tempering Eggs: If using eggs in a warm mixture, temper them by slowly adding a small amount of the warm mixture to the eggs before combining them fully. This prevents the eggs from scrambling and ensures a smooth batter.
Step 1: Prepare Ingredients

Gather all ingredients on your countertop for easy access.
Measure each ingredient accurately using appropriate measuring tools.
Preheat your oven to the required temperature before starting to mix.
This ensures that your batter is ready for baking as soon as it’s mixed.
Step 2: Cream Butter and Sugar

In a stand mixer, combine softened butter and sugar.
Beat on medium speed until the mixture is light and fluffy, usually about 3-5 minutes.
Look for a pale yellow color and increased volume as air is incorporated.
Scrape down the bowl halfway through to ensure even mixing.
Step 3: Add Eggs and Vanilla

With the mixer on low speed, add eggs one at a time, allowing each to fully incorporate.
Pour in the vanilla extract and mix until just combined.
The batter should appear smooth and slightly glossy at this stage.
Avoid over-mixing to maintain the batter’s lightness.
Step 4: Incorporate Dry Ingredients

In a separate bowl, sift together the flour and any other dry ingredients like baking powder.
Gradually add the dry mixture to the wet ingredients while the mixer runs on low speed.
Stop mixing as soon as there are no visible dry patches to avoid overworking the batter.
The mixture should be thick and slightly lumpy.
Step 5: Fold in Berries

Gently fold in the fresh berries using a spatula.
Be careful not to mash the berries; you want them to stay intact for bursts of flavor.
Ensure they are evenly distributed throughout the batter.
This step adds a beautiful color and freshness to the final product.
Step 6: Prepare the Baking Pan

Grease your baking pan with butter or line it with parchment paper.
This step is crucial to prevent sticking and ensure easy removal.
Make sure to cover the corners and edges well.
This will result in a beautifully shaped cake once baked.
Step 7: Pour Batter into Pan

Carefully pour the batter into the prepared baking pan.
Use a spatula to smooth the top evenly.
This helps with even baking and a nice presentation.
Gently tap the pan on the counter to remove any air bubbles.
Step 8: Bake the Cake

Place the baking pan in the preheated oven and set the timer.
Bake for about 30 minutes or until a toothpick inserted into the center comes out clean.
Check for a golden brown color on top and a firm bounce when lightly pressed.
Avoid opening the oven door too early to prevent collapse.
Step 9: Cool and Dust with Sugar

Once baked, remove the cake from the oven and let it cool in the pan for 10 minutes.
Then transfer it to a wire rack to cool completely.
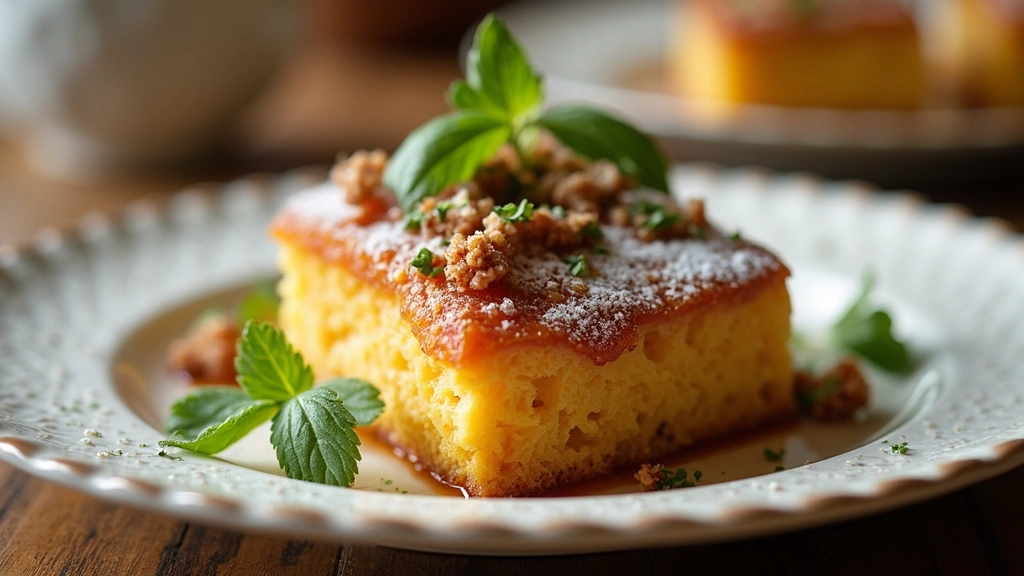
Dust the top with powdered sugar for an elegant finish just before serving.
This adds a touch of sweetness and enhances visual appeal.
Critical Timing and Temperature Guide
Baking Time: Bake the cake for exactly 30 minutes or until a toothpick inserted comes out clean. If overbaked, the cake will become dry. Keep an eye on it in the last few minutes to avoid this issue.
Cooling Time: Allow the cake to cool in the pan for 10 minutes before transferring it to a wire rack. This ensures it sets properly and makes it easier to handle.
Serving Temperature: Serve the cake at room temperature for the best flavor and texture. Chilling it in the fridge can make it dense.
Pro Tips for Joy Of Baking Recipes That Never Fail
• Ingredient Selection: Use fresh, high-quality berries for the best flavor and texture in your cake.
• Preparation Secret: Let your eggs come to room temperature before mixing; this helps them emulsify better.
• Temperature Management: Ensure your butter is softened but not melted for proper creaming.
• Texture Enhancement: Avoid over-mixing the batter once the flour is added to maintain a light, fluffy texture.
• Flavor Layering: Consider adding a splash of lemon juice to the batter for a hint of brightness that complements the berries.
• Make-Ahead Strategies: The batter can be prepared a day ahead; just store it in the refrigerator until ready to bake.
• Restaurant-Quality Finishing Touches: Serve with a dollop of whipped cream or a scoop of vanilla ice cream for an elegant dessert.
• Equipment Optimization: If using a handheld mixer, ensure you mix thoroughly in a large bowl to prevent splattering.
Troubleshooting Common Issues
• Texture Too Dense: This often occurs due to over-mixing after adding flour. Ensure to mix until just combined to keep air in the batter.
• Uneven Baking: If the cake is browning too quickly or unevenly, check the oven temperature with an oven thermometer. Adjust the rack position if necessary.
• Sticking to the Pan: Ensure the pan is greased well or lined with parchment paper. If it still sticks, run a knife around the edges before inverting.
• Flavor Lacking: If the cake tastes bland, consider adding a pinch of salt to enhance the flavors, or increase the vanilla extract slightly.
• Too Sweet: If the cake is overly sweet, balance it with a tangy topping like cream cheese frosting or a berry compote.
Variations and Regional Differences
• Italian Berry Cake: This version includes ricotta cheese in the batter, adding a rich, creamy texture. It often features citrus zest for added brightness.
• German Streusel Cake: A crumbly streusel topping made from butter, flour, and sugar is added for a crunchy texture on top of the moist cake.
• American Coffee Cake: This variation includes cinnamon in the batter and a crumb topping, making it perfect for brunch.
• Modern Interpretations: Consider vegan or gluten-free adaptations using almond flour and flaxseed eggs while adjusting the baking time accordingly.
Food Science Behind the Recipe
• Emulsification: This process, where fat (butter) and water (eggs) combine, is critical for achieving a uniform batter. Proper emulsification leads to a tender crumb.
• Leavening: Using baking powder creates carbon dioxide when mixed with wet ingredients, causing the batter to rise. Understanding this helps in achieving the desired height and texture in the cake.
• Maillard Reaction: This chemical reaction between sugars and proteins occurs during baking and gives the cake its golden-brown color and complex flavor. Proper baking time and temperature ensure this reaction happens optimally.
Frequently Asked Questions
What’s the most common mistake people make when preparing Joy of Baking recipes? Over-mixing the batter after adding flour can lead to a dense cake. Mix until just combined for the best results.
Can I prepare components of this dish in advance? Yes, the batter can be made a day ahead and stored in the refrigerator until baking.
How do I adapt this recipe for dietary restrictions? For gluten-free, substitute all-purpose flour with a gluten-free blend and adjust the liquid as needed.
What’s the best way to store and reheat leftovers? Store leftovers in an airtight container at room temperature for up to two days. Reheat in the oven for a few minutes for best texture.
Can I freeze this dish? Yes, this cake can be frozen for up to three months. Wrap it tightly in plastic wrap and foil before freezing.
What wine or beverages pair best with this dish? A light sparkling wine or a cup of herbal tea pairs wonderfully, enhancing the flavors of the cake.
How can I scale this recipe up for a crowd? Simply multiply the ingredients by the number of servings needed and use larger pans to accommodate the increased volume.
What side dishes complement this recipe best? Fresh fruit salad or a light whipped cream complements the cake beautifully.
How do professional chefs elevate this dish for restaurant service? Professional chefs often add a gourmet twist, such as a berry coulis or edible flowers for decoration.
Serving and Presentation Guide
• Traditional Presentation: Serve the cake on a cake stand, dusted with powdered sugar, and surrounded by fresh berries for a classic touch.
• Modern Plating Ideas: Slice the cake into elegant wedges and plate with a smear of berry compote and a dollop of whipped cream.
• Accompaniment Suggestions: Serve with a scoop of vanilla ice cream or a cup of coffee to enhance the dessert experience.
• Special Occasion Presentation: For celebrations, layer the cake with frosting and fresh fruit, creating a multi-tiered effect that’s visually stunning.
Conclusion
This Joy of Baking recipe is sure to become a favorite in your home.
With its simple preparation and delightful flavors, it’s perfect for any occasion.
I hope you enjoy making and sharing this delightful cake with your loved ones.


