
Flour and baking powder recipes have been the cornerstone of countless kitchens, bringing warmth and comfort to family tables.
The delightful combination of light and fluffy textures, along with rich flavors, makes these bakes a favorite for both novice and seasoned bakers alike.
I first fell in love with these recipes while baking with my grandmother, who taught me the magic of a perfectly risen cake.
Whether you’re looking to impress at a gathering or simply enjoy a sweet treat at home, these recipes promise perfect results with straightforward techniques.
The History and Cultural Significance
• Flour and baking powder recipes trace their origins to the 19th century when baking powder was first introduced as a leavening agent.
• The dish evolved over decades as home bakers began experimenting with different flavor profiles and ingredient combinations, eventually leading to the beloved desserts we enjoy today.
• In many cultures, baked goods made from flour and baking powder are staples at celebrations, symbolizing joy and togetherness.
• While many variations exist across different regions, the authentic versions often retain the use of simple ingredients that highlight the natural flavors.
Recipe Overview
Nutritional Information (per serving)
Ingredients
Essential Equipment Guide
Mixing Bowl: A sturdy mixing bowl is essential for combining ingredients smoothly. Look for one that is large enough to prevent spills and made from materials like glass or stainless steel for durability.
Measuring Cups and Spoons: Accurate measurements are crucial for baking success. Invest in a set that clearly indicates measurements and is comfortable to hold.
Whisk or Electric Mixer: Whisking is vital for incorporating air into the batter. An electric mixer can speed up this process and ensure a light, fluffy texture.
Preparation Methods
Sifting Flour: Sifting flour aerates it, removing lumps and ensuring an even texture in your batter. This step is essential for achieving a light cake.
Creaming Butter and Sugar: This technique involves beating softened butter with sugar until fluffy. It incorporates air, which helps the baked good rise.
Folding Ingredients: Gently mixing dry ingredients into wet without deflating the batter is crucial. Use a spatula and a gentle motion to maintain the airiness.
Step 1: Prepare Ingredients

Gather all your ingredients on the countertop.
Ensure that the butter is softened and eggs are at room temperature.
This will help them blend more easily into the batter.
Pre-measuring ingredients will also streamline the cooking process.
Step 2: Preheat the Oven

Preheat your oven to 350°F (175°C).
This ensures that your baked goods start cooking at the right temperature.
Use an oven thermometer to check accuracy, as many ovens can be off by a few degrees.
Allow at least 15 minutes for the oven to fully heat up.
Step 3: Sift Dry Ingredients

In a large mixing bowl, sift together the flour, baking powder, and salt.
Sifting adds air and removes lumps, ensuring a smooth batter.
Mix these dry ingredients well to combine them thoroughly.
This step is crucial for achieving a fluffy texture in the final bake.
Step 4: Cream Butter and Sugar

In another mixing bowl, beat the softened butter and sugar together until light and fluffy.
This process should take about 3-5 minutes using an electric mixer.
Look for a pale, creamy mixture that has increased in volume.
Proper creaming is key to a light and airy cake.
Step 5: Add Eggs and Vanilla

Add the eggs one at a time to the butter-sugar mixture, mixing well after each addition.
Then, stir in the vanilla extract until everything is combined.
This will enhance the flavor and help bind the mixture.
Make sure to scrape down the sides of the bowl to incorporate all ingredients.
Step 6: Combine Wet and Dry Ingredients

Gradually add the dry ingredients to the wet mixture, alternating with the milk.
Start and end with the dry ingredients to keep the mixture balanced.
Mix just until combined to avoid overworking the batter.
Look for a thick but pourable consistency.
Step 7: Prepare the Baking Pan

Grease and flour your baking pan to prevent sticking.
You can also line it with parchment paper for extra security.
Make sure the entire surface is covered evenly.
This step ensures easy removal of the baked goods once they are done.
Step 8: Pour and Bake

Pour the batter into the prepared baking pan and smooth the top with a spatula.
Gently tap the pan on the counter to remove any air bubbles.
Place it in the preheated oven and bake for 25-30 minutes.
A toothpick inserted in the center should come out clean when it’s done.
Step 9: Cool and Serve

Once baked, remove the pan from the oven and allow it to cool for about 10 minutes.
Then, turn out the cake onto a wire rack to cool completely.
This prevents sogginess and helps maintain the cake’s texture.
Once cool, serve it plain or with your favorite icing or toppings.
Critical Timing and Temperature Guide
Baking Time: Bake for 25-30 minutes at 350°F (175°C). The cake should be golden brown, and a toothpick should come out clean from the center.
Cooling Time: Allow the cake to cool in the pan for 10 minutes, then transfer to a wire rack. This helps the cake set properly and prevents it from becoming gummy.
Room Temperature Ingredients: Ensure eggs and butter are at room temperature for better emulsification and a smoother batter.
Pro Tips for Flour And Baking Powder Recipes For Perfect Bakes
• Ingredient Selection: Use high-quality all-purpose flour and fresh baking powder to ensure the best rise and texture.
• Preparation Secret: Let your butter sit out until it’s very soft, but not melted, for perfect creaming.
• Temperature Management: Always preheat your oven fully before baking to ensure even cooking.
• Texture Enhancement: Fold the batter gently after adding dry ingredients to maintain the airiness.
• Flavor Layering: Experiment with adding citrus zest or spices to the batter for a unique flavor profile.
• Make-Ahead Strategies: Prepare the batter in advance and store it in the refrigerator for up to 24 hours before baking.
• Restaurant-Quality Finishing Touches: Dust with powdered sugar or drizzle with a simple glaze before serving for a professional look.
• Equipment Optimization: Use a stand mixer for the best results, as it can efficiently incorporate air into your batter.
Troubleshooting Common Issues
• Texture Too Dense: This often occurs from overmixing the batter. Mix until just combined and avoid heavy stirring.
• Uneven Baking: If your cake rises unevenly, check your oven temperature with a thermometer. Rotate the pan halfway through baking for even results.
• Dry or Crumbly Cake: This can result from too much flour or not enough moisture. Measure flour correctly and ensure all wet ingredients are included.
• Too Sweet: If the cake is overly sweet, reduce the sugar slightly in future attempts. Balance it with a tart frosting.
• Sticking to the Pan: Always grease and flour your pans properly. If stuck, run a knife around the edges before inverting.
Variations and Regional Differences
• Southern Buttermilk Cake: Incorporates buttermilk for a tangy flavor and moist texture, often topped with a cream cheese frosting.
• Italian Pan di Spagna: A lighter sponge cake that uses whipped egg whites for increased airiness, typically served with fresh fruit.
• German Pancake: This variation is baked in a skillet and puffs up dramatically, served with powdered sugar and lemon juice.
• Modern Interpretations: Adaptations include gluten-free flour or dairy-free milk options while retaining the classic texture.
Food Science Behind the Recipe
• Leavening Agent Action: Baking powder releases carbon dioxide when mixed with wet ingredients, causing the batter to rise. Understanding this helps you know when to mix.
• Aeration through Creaming: Creaming butter and sugar incorporates air, which expands during baking, leading to a light texture. This is a critical step for successful cakes.
• Protein Structure Development: Gluten forms when flour is mixed with liquid, providing structure. Minimizing mixing time helps keep the cake tender.
Frequently Asked Questions
What’s the most common mistake people make when preparing flour and baking powder recipes? Overmixing the batter can lead to a dense texture; mix just until combined.
Can I prepare components of this dish in advance? Yes, you can prepare the batter up to 24 hours ahead and store it in the refrigerator before baking.
How do I adapt this recipe for dietary restrictions? Substitute all-purpose flour with gluten-free flour and use a dairy-free milk option for lactose intolerance.
What’s the best way to store and reheat leftovers? Store leftover cake in an airtight container at room temperature. Reheat in the microwave for a few seconds to enjoy it warm.
Can I freeze this dish? Yes, you can freeze the baked cake wrapped tightly in plastic wrap for up to three months. Thaw in the refrigerator before serving.
What wine or beverages pair best with this dish? A light sparkling wine or a cup of coffee complements the sweetness of the cake.
How can I scale this recipe up for a crowd? Simply double the ingredients and bake in a larger pan, increasing the baking time by 5-10 minutes.
What side dishes complement this recipe best? Fresh fruit or a scoop of vanilla ice cream pairs beautifully with the cake.
How do professional chefs elevate this dish for restaurant service? Chefs often add a layer of chocolate ganache or fresh seasonal fruit for added flavor and visual appeal.
Serving and Presentation Guide
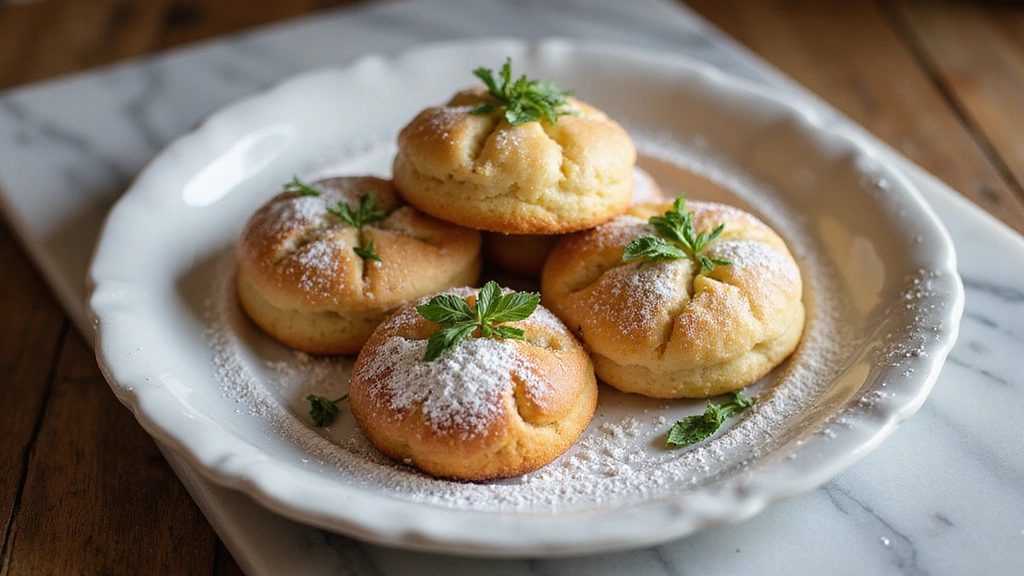
• Traditional Presentation: Serve the cake on a decorative plate, dusted with powdered sugar and garnished with fresh berries for a classic look.
• Modern Plating Ideas: Slice the cake and arrange the pieces artfully on a slate board with a drizzle of sauce.
• Accompaniment Suggestions: Serve with whipped cream or a scoop of ice cream to enhance the dessert experience.
• Special Occasion Presentation: Create a tiered cake setup for celebrations, with elegant decorations and fresh flowers.
Conclusion
I hope this recipe inspires you to create your own perfect bakes at home.
The joy of baking is truly unparalleled, especially when shared with loved ones.
Give it a try, and you might just find it becomes a cherished part of your family tradition.


