
Baking with precision is an art that transforms simple ingredients into delightful creations.
This guide to baking recipes in grams simplifies the process, ensuring every home baker can achieve consistent and delicious results.
Whether you’re a novice in the kitchen or an experienced home baker, understanding measurements in grams can elevate your baking game.
Join me as we explore numerous recipes that are not only easy to follow but also yield impressive results for any occasion.
The History and Cultural Significance
• Baking recipes in grams became popular in Europe in the early 20th century as precision in baking was increasingly valued.
• The shift from cups to grams allowed for more accurate measurements, which is crucial in baking to achieve desired textures and flavors.
• In many cultures, baking is a communal activity, often carried out during festivities and family gatherings, symbolizing togetherness and celebration.
• While variations exist, the emphasis on precision in grams remains a key characteristic that sets apart successful baking from trial and error.
Recipe Overview
Nutritional Information (per serving)
Ingredients
Essential Equipment Guide
Digital Kitchen Scale: A digital kitchen scale is crucial for measuring ingredients accurately in grams. Look for a model that offers a tare function to reset the weight to zero after placing a bowl or container.
Mixing Bowls: Sturdy mixing bowls help combine ingredients effectively. Opt for stainless steel or glass bowls, as they are durable and easy to clean.
Whisk: A quality whisk is important for incorporating air into batters and mixtures. Choose a whisk with a comfortable grip and ensure the wires are flexible enough to reach all corners of the bowl.
Preparation Methods
Measuring in Grams: Measuring ingredients in grams allows for accuracy that can greatly affect the final product. Use a digital scale for the best results, and remember to tare the scale for each ingredient.
Butter Cutting Technique: When cutting cold butter into flour, use a pastry cutter or your fingers to break it down until it resembles coarse crumbs. This technique helps create a flaky texture in baked goods.
Egg Tempering: If adding eggs to a warm mixture, temper them first by whisking a bit of the warm mixture into the eggs before combining them. This prevents the eggs from scrambling and ensures a smooth batter.
Step 1: Prepare Ingredients

Begin by gathering all your ingredients on a clean workspace.
Ensure that your digital scale is set to grams for accurate measurements.
Sift the flour to aerate it, which helps create a lighter texture.
Pre-measure all ingredients to streamline the mixing process.
Step 2: Mix the Dry Ingredients

In a large mixing bowl, combine the sifted flour and granulated sugar.
Whisk the dry ingredients together until evenly mixed.
This step ensures that the sugar is distributed evenly throughout the flour.
Set the bowl aside while you prepare the wet ingredients.
Step 3: Cream the Butter

Place the cubed cold butter into a separate mixing bowl.
Using an electric mixer, beat the butter on medium speed until creamy and smooth.
This process should take about 2-3 minutes.
Make sure there are no lumps remaining in the butter for a uniform batter.
Step 4: Incorporate the Eggs

Add the eggs one at a time to the creamed butter, mixing well after each addition.
This ensures that each egg is fully incorporated before adding the next.
The batter should become lighter and fluffier as you mix.
Be careful not to overmix, as this can lead to a dense texture.
Step 5: Combine Wet and Dry Ingredients

Gradually add the dry ingredients to the wet mixture, mixing on low speed.
Stop mixing as soon as the flour is fully incorporated to avoid overworking the batter.
The mixture should be slightly lumpy, which is perfectly fine for a tender crumb.
Scrape down the sides of the bowl to ensure no flour is left unmixed.
Step 6: Prepare the Baking Pan

Preheat your oven to 180°C (350°F) while you prepare the baking pan.
Grease and line an 8-inch round cake pan with parchment paper for easy removal.
This step prevents the cake from sticking and ensures even baking.
Set the prepared pan aside until the batter is ready.
Step 7: Pour the Batter into the Pan

Carefully pour the batter into the prepared cake pan, using a spatula to scrape every last bit from the bowl.
Spread the batter evenly across the pan for uniform baking.
Gently tap the pan on the counter to release any air bubbles trapped in the batter.
This helps in achieving a smooth, even cake surface.
Step 8: Bake the Cake

Place the cake pan in the preheated oven and bake for 25-30 minutes.
Check for doneness by inserting a toothpick in the center; it should come out clean.
Avoid opening the oven door too early, as this can affect rising.
Once baked, remove the pan from the oven and let it cool in the pan for 10 minutes.
Step 9: Cool and Remove from Pan

After 10 minutes, carefully invert the cake onto a wire rack to cool completely.
Gently peel off the parchment paper to prevent tearing.
Let the cake cool for at least 30 minutes before frosting or serving.
This cooling process helps set the structure of the cake.
Step 10: Prepare the Topping

While the cake cools, prepare the topping by mixing powdered sugar with a splash of water or milk until smooth.
The consistency should be pourable but thick enough to hold its shape.
This simple glaze adds sweetness and gloss to the cake.
Set aside the glaze until the cake is completely cooled.
Step 11: Glaze the Cake

Once the cake has cooled completely, drizzle the glaze over the top using a spoon.
Allow the glaze to drip down the sides for a rustic finish.
You can also spread it with a spatula if you prefer a more even coating.
Finish with a sprinkle of slivered almonds for added texture and flavor.
Step 12: Serve and Enjoy

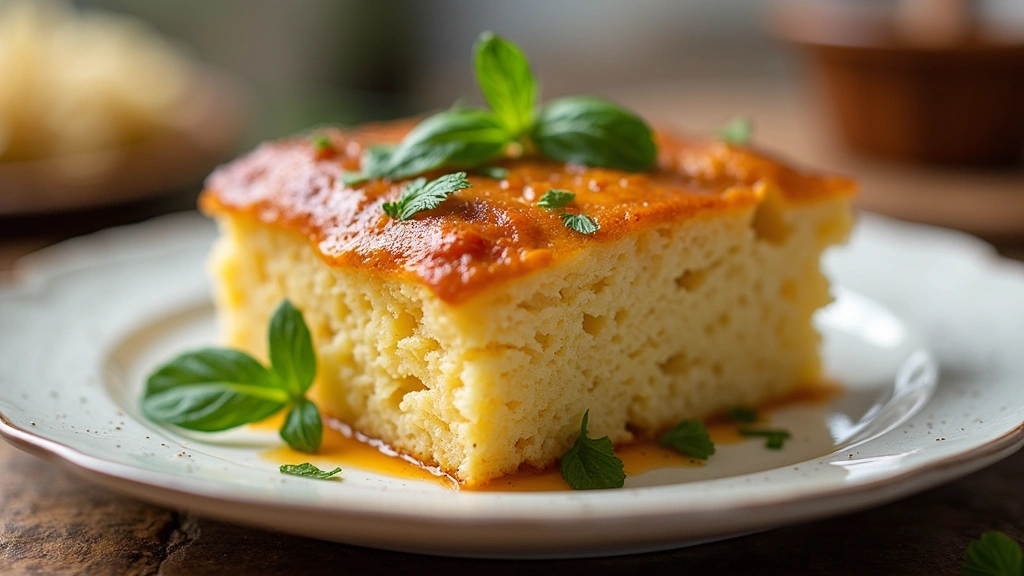
Slice the cake into wedges and serve on dessert plates.
This cake pairs beautifully with a cup of tea or coffee.
Consider garnishing with fresh fruit or additional nuts for an elegant touch.
Enjoy the fruits of your labor with friends and family!
Critical Timing and Temperature Guide
Baking Time: Bake the cake for 25-30 minutes at 180°C (350°F). Look for a golden-brown color and a toothpick inserted in the center should come out clean. Avoid opening the oven door before 25 minutes to prevent collapsing.
Cooling Time: Allow the cake to cool in the pan for 10 minutes before transferring it to a wire rack. The cooling process is crucial for setting the structure, taking about 30 minutes in total before frosting.
Glazing Time: After the cake has cooled completely, apply the glaze immediately. If the cake is still warm, the glaze will melt off, so ensure it’s fully cooled.
Pro Tips for Baking Recipes In Grams Made Simple To Follow
• Ingredient Selection: Use high-quality butter and fresh eggs to enhance flavor.
• Preparation Secret: Chill your mixing bowl and beaters before creaming butter for a fluffier texture.
• Temperature Management: Ensure ingredients are at room temperature for better emulsification, especially eggs and butter.
• Texture Enhancement: Fold the batter gently to incorporate air without deflating it, leading to a light cake.
• Flavor Layering: Add vanilla extract or citrus zest to elevate the flavor profile.
• Make-Ahead Strategies: The cake can be baked a day in advance and stored wrapped in plastic wrap at room temperature.
• Restaurant-Quality Finishing Touches: Lightly dust with powdered sugar before serving for a professional look.
• Equipment Optimization: Ensure your oven is calibrated for accurate baking temperatures, which can greatly affect results.
Troubleshooting Common Issues
• Texture Too Dense: This can occur if the batter is overmixed. Recognize it by a heavy feel; to fix, reduce mixing time next time or check ingredient measurements.
• Uneven Baking: If the cake bakes unevenly, your oven may have hot spots. Rotate the pan halfway through baking to ensure even cooking.
• Glaze Not Setting: If the glaze is too runny, add more powdered sugar. This can be recognized if it pools at the bottom instead of drizzling.
• Cake Sticking to the Pan: Always line the pan with parchment paper and grease it well. If it sticks, try cooling longer before removing.
• Flavor Lacking: If the cake tastes bland, increase the sugar slightly or add a pinch of salt to enhance flavors.
Variations and Regional Differences
• Italian Version: Known as Torta della Nonna, it includes a custard filling and pine nuts on top, offering a richer flavor profile.
• German Variation: The well-known Schwarzwälder Kirschtorte incorporates layers of chocolate cake, cherries, and whipped cream for a decadent dessert.
• American Style: Often called a pound cake, this version uses equal parts of flour, sugar, butter, and eggs, resulting in a denser texture.
• Modern Interpretations: Incorporating gluten-free flour or substituting sugar with natural sweeteners like honey or maple syrup caters to contemporary dietary preferences.
Food Science Behind the Recipe
• Maillard Reaction: This reaction between sugars and proteins creates the golden-brown crust on baked goods, enhancing flavor and aroma. Understanding this helps in achieving the perfect bake.
• Gluten Development: When flour is mixed with liquid, gluten forms, giving structure to baked goods. Proper mixing and resting times affect the final texture, so knowing when to stop is key.
• Emulsification: The process of combining fats and liquids helps create a smooth batter. Adding eggs gradually aids in creating a stable emulsion, which results in a tender cake.
Frequently Asked Questions
What’s the most common mistake people make when preparing baking recipes in grams? Many people underestimate the importance of accurate measurements, leading to inconsistent results. Always double-check your scale settings before measuring.
Can I prepare components of this dish in advance? Yes, you can bake the cake a day ahead and keep it wrapped in plastic at room temperature. Glaze it just before serving for the best appearance.
How do I adapt this recipe for dietary restrictions? For gluten-free options, substitute all-purpose flour with a 1:1 gluten-free blend. For vegan adaptations, use flax eggs in place of regular eggs.
What’s the best way to store and reheat leftovers? Store leftovers in an airtight container at room temperature for up to 3 days. To reheat, place in a preheated oven at 160°C (320°F) for 10-15 minutes.
Can I freeze this dish? Yes, the cake can be frozen. Wrap tightly in plastic wrap and store in an airtight container for up to 3 months. Thaw overnight in the refrigerator before serving.
What wine or beverages pair best with this dish? A light dessert wine or a cup of Earl Grey tea pairs beautifully with this cake, balancing the sweetness with its citrus notes.
How can I scale this recipe up for a crowd? To scale up, simply multiply the ingredient quantities by the number of servings desired, and be sure to adjust baking time as needed based on the size of your baking pan.
What side dishes complement this recipe best? Fresh fruit salad or a scoop of vanilla ice cream perfectly complements the cake’s sweetness and adds freshness.
How do professional chefs elevate this dish for restaurant service? Professional chefs often add a layer of homemade fruit compote or a dollop of whipped cream to enhance flavor and presentation.
Serving and Presentation Guide
• Traditional Presentation: Serve the cake on a rustic wooden board with a light dusting of powdered sugar and a few fresh berries for a classic look.
• Modern Plating Ideas: For a contemporary twist, slice the cake and arrange it on a square plate with a drizzle of glaze and a sprinkle of edible flowers.
• Accompaniment Suggestions: Pair the cake with a scoop of vanilla bean ice cream or a dollop of whipped cream to add richness.
• Special Occasion Presentation: Decorate the cake with seasonal fruits and a sprig of mint for a festive touch, making it perfect for celebrations.
Conclusion
I hope this guide to baking recipes in grams has inspired you to take your baking to the next level.
With precise measurements and simple techniques, you can create delicious treats that impress family and friends.
Don’t hesitate to experiment and make this recipe your own. Enjoy baking!


