Simple millet baking recipes bring a wholesome touch to your everyday meals that is both nutritious and versatile.
With a subtle nutty flavor and delightful texture, millet is an often-overlooked grain that can elevate your baking game.
I first fell in love with millet while exploring rustic bakeries in the countryside, where it was embraced for its health benefits and satisfying qualities.
Whether you’re whipping up a quick bread or experimenting with muffins, these recipes promise to deliver comfort and satisfaction without the fuss.
The History and Cultural Significance
• Millet baking recipes trace their origins to ancient civilizations in Asia and Africa, where millet was a staple grain.
• The dish evolved over centuries as different cultures adapted millet into their baking practices, leading to a variety of delicious forms.
• In many cultures, millet is traditionally consumed during harvest festivals, symbolizing prosperity and health.
• While many variations exist across different regions, the authentic use of millet maintains a grounding connection to nature and simplicity that sets it apart from modern grains.
Recipe Overview
Nutritional Information (per serving)
Ingredients
Essential Equipment Guide
Mixing Bowl: A sturdy mixing bowl is essential for combining the dry and wet ingredients thoroughly. Look for a non-slip base to prevent movement during mixing.
Baking Dish: A good-quality baking dish ensures even heat distribution. Opt for glass or ceramic for best results, as they retain heat well and provide a nice crust.
Whisk: A whisk is crucial for aerating the batter, helping to incorporate air for a lighter texture. Choose a sturdy stainless steel whisk for durability.
Preparation Methods
Rinsing Millet: Rinsing millet helps remove any bitter residue and improves the grain’s flavor. Use a fine-mesh sieve to wash the millet under cold water until the water runs clear.
Cooking Millet: Cooking millet properly ensures that it is fluffy and light. Bring water to a boil, add millet, then reduce to a simmer and cover for about 20 minutes.
Incorporating Ingredients: Mixing wet and dry ingredients separately before combining helps achieve a uniform batter. This prevents overmixing, which can lead to a dense texture.
Step 1: Rinse the Millet

Begin by measuring out one cup of millet.
Place the millet in a fine-mesh sieve and rinse it under cold water.
Swirl the millet gently to ensure all grains are washed thoroughly.
Rinsing removes any residual bitterness, enhancing the final flavor.
Step 2: Cook the Millet

In a saucepan, combine the rinsed millet and two cups of water.
Bring the mixture to a boil over medium-high heat.
Once boiling, reduce the heat to low, cover, and let it simmer for about 20 minutes.
The millet should absorb all the water and become fluffy when done.
Step 3: Prepare the Dry Ingredients

In a mixing bowl, combine the sifted all-purpose flour, baking powder, and salt.
Use a whisk to blend the dry ingredients evenly, ensuring no lumps remain.
This step is crucial for achieving a well-risen baked good.
Set aside the bowl while you prepare the wet ingredients.
Step 4: Mix the Wet Ingredients

In a separate bowl, combine the honey, vegetable oil, and vanilla extract.
Whisk together until the mixture is smooth and well-blended.
This creates a wet base that adds moisture and sweetness to the batter.
Make sure the honey is fully incorporated to avoid clumps.
Step 5: Combine Wet and Dry Ingredients

Pour the wet mixture into the bowl with the dry ingredients.
Gently fold the mixture using a spatula until just combined.
Avoid overmixing, as this can lead to a dense texture in the final product.
The batter should remain slightly lumpy.
Step 6: Stir in the Cooked Millet

Once the batter is combined, fold in the cooked millet and nuts.
Ensure the millet is evenly distributed throughout the batter for consistent texture.
This addition enhances the nutritional value and adds a pleasing bite to the dish.
Be careful not to break the millet grains.
Step 7: Prepare the Baking Dish

Preheat your oven to 350°F (175°C).
Grease your baking dish with a little vegetable oil or line it with parchment paper.
This prevents sticking and ensures easy removal of the baked good.
Make sure the dish is ready before pouring in the batter.
Step 8: Pour and Bake

Pour the batter into the prepared baking dish, smoothing the top with a spatula.
Place the dish in the preheated oven and bake for 30 minutes.
Check for doneness by inserting a toothpick into the center; it should come out clean.
The top should be golden brown and slightly firm to the touch.
Step 9: Cool and Serve

Once baked, remove the dish from the oven and let it cool for about 10 minutes.
Carefully run a knife around the edges to loosen any sticking parts.
Invert the dish onto a cooling rack to cool completely before slicing.
Serving while still warm enhances the flavors and texture.
Step 10: Enjoy!

Slice the millet bread into thick pieces for serving.
Pair it with butter, honey, or your favorite jam for extra flavor.
Enjoy the bread warm, or store leftovers for later.
This versatile bread can be enjoyed at breakfast or as a side with meals.
Critical Timing and Temperature Guide
Cooking Millet: Cook millet for exactly 20 minutes on low heat after bringing it to a boil. Look for all the water to be absorbed and the millet fluffy. Common mistakes include not rinsing millet or cooking it too quickly.
Baking Time: Bake for 30 minutes at 350°F (175°C). The bread should be golden and firm; a toothpick test is crucial for doneness. Overbaking can lead to a dry texture, so keep an eye on it.
Cooling Time: Allow the bread to cool for at least 10 minutes before slicing. This helps it set and prevents crumbling. Cutting too early can result in a dense texture.
Pro Tips for Millet Baking Recipes For Everyday Baking
• Ingredient Selection: Use high-quality whole millet for the best flavor and nutritional benefits. Freshly ground flour can also enhance the texture.
• Preparation Secret: Let the cooked millet cool slightly before adding it to the batter; this helps to maintain the batter’s temperature and texture.
• Temperature Management: Ensure all ingredients are at room temperature before mixing, as this improves the batter’s uniformity.
• Texture Enhancement: Incorporate a little extra oil if you prefer a richer, moist texture.
• Flavor Layering: Consider adding spices like cinnamon or nutmeg for a warm flavor profile.
• Make-Ahead Strategies: Prepare the millet and dry ingredients in advance and store them separately in airtight containers.
• Restaurant-Quality Finishing Touches: Drizzle a bit of honey or sprinkle seeds on top before serving for an appealing look.
• Equipment Optimization: Use a sturdy spatula to gently fold ingredients without overmixing.
Troubleshooting Common Issues
• Texture Too Dense: This usually happens from overmixing or using too much flour. Ensure to fold ingredients gently and measure flour correctly.
• Flavor Too Bland: If the flavor falls flat, try adding a pinch of salt or more sweetener. Flavoring agents like vanilla or spices can also enhance the taste.
• Bread Sticking to the Pan: Always grease the pan well or use parchment paper. Letting it cool before removing can also help.
• Not Rising Properly: Confirm that your baking powder is fresh, as expired leavening agents can lead to flat results.
• Overbaked Bread: Keep an eye on the bread towards the end of the baking time. If it browns too quickly, consider covering it with foil.
Variations and Regional Differences
• Indian Millet Flatbread: In India, millet is often used to make flatbreads known as ‘roti’ or ‘chapati,’ which are unleavened and cooked on a hot griddle.
• African Millet Porridge: In many African cultures, millet is prepared as a porridge, often sweetened and flavored with spices, reflecting its versatility.
• Modern Gluten-Free Muffins: Contemporary recipes often incorporate millet flour in gluten-free baking, offering a nutritious alternative to wheat-based muffins.
• Sweet and Savory Variations: Experimenting with flavors by adding fruits or herbs can create unique twists on traditional recipes.
Food Science Behind the Recipe
• Gelatinization: When millet is cooked, its starches gelatinize, allowing it to absorb water and swell, contributing to its fluffy texture.
• Leavening Action: The baking powder releases gases during baking, causing the batter to rise. Understanding this helps you manage the amount needed for optimal results.
• Emulsification: Combining oil and honey helps create a stable batter where fats are evenly distributed, contributing to a moist final product.
Frequently Asked Questions
What’s the most common mistake people make when preparing millet baking recipes? Many overlook rinsing millet, which can result in a bitter taste. Always rinse to enhance the flavor.
Can I prepare components of this dish in advance? Yes, you can prepare cooked millet and dry ingredients ahead of time. Store them separately in airtight containers for up to a week.
How do I adapt this recipe for dietary restrictions? To make it vegan, substitute honey with maple syrup or agave nectar. For gluten-free options, use gluten-free all-purpose flour.
What’s the best way to store and reheat leftovers? Store leftovers in an airtight container in the fridge for up to 3 days. Reheat in the oven at 350°F until warmed through.
Can I freeze this dish? Yes, wrap the baked bread in plastic wrap and foil, then freeze for up to 3 months. Thaw at room temperature before reheating.
What wine or beverages pair best with this dish? A light white wine like Sauvignon Blanc complements the nutty flavors, while herbal teas also work well.
How can I scale this recipe up for a crowd? Simply double the ingredients and use a larger baking dish, adjusting baking time as needed to ensure even cooking.
What side dishes complement this recipe best? Fresh salads or vegetable soups pair beautifully, providing a contrast to the hearty bread.
How do professional chefs elevate this dish for restaurant service? Chefs often add gourmet toppings or serve with artisanal spreads to enhance presentation and flavor.
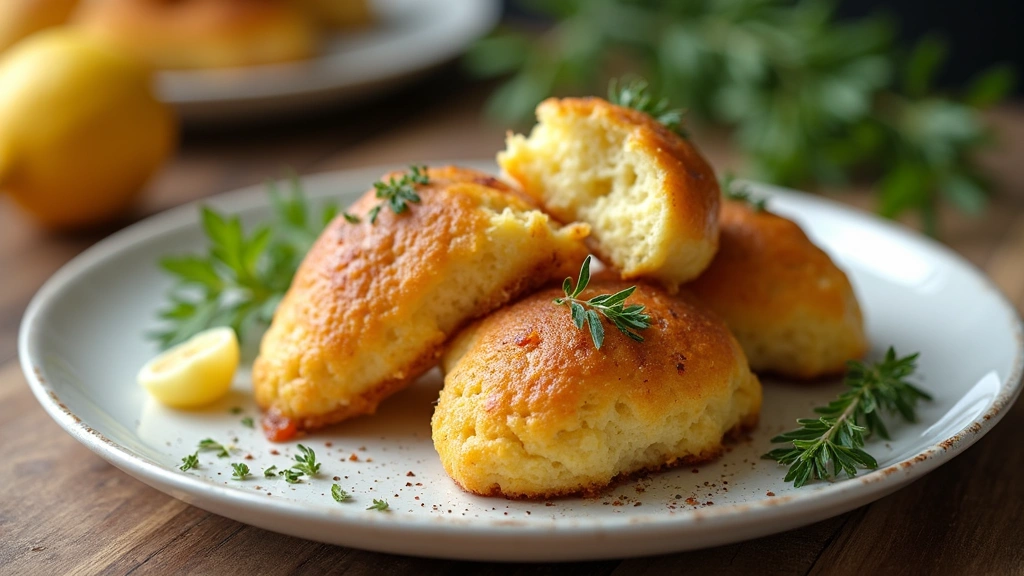
Serving and Presentation Guide
• Traditional Presentation: Serve the millet bread sliced on a wooden board with small bowls of butter and honey, enhancing the rustic feel.
• Modern Plating Ideas: Stack slices on a white plate, garnished with fresh herbs or edible flowers for an elegant touch.
• Accompaniment Suggestions: Pair with a fresh green salad or roasted vegetables for a balanced meal.
• Special Occasion Presentation: For gatherings, serve on a large platter with assorted dips and spreads, inviting guests to explore flavors.
Conclusion
I hope you give these simple millet baking recipes a try in your own kitchen.
The unique flavors and textures are sure to impress both family and friends.
Happy baking, and enjoy this nutritious addition to your everyday meals!