
Baking has always been a magical experience, but adding a sprinkle of enchantment can elevate your creations to a whole new level.
These Kitchen Witch Baking Recipes with a Magical Touch blend tradition with a hint of whimsy, making each bite a delightful surprise.
From the warmth of cinnamon to the sweetness of vanilla, the flavors come together to create a symphony of taste that dances on your palate.
Whether you’re celebrating a full moon or simply indulging in a cozy evening, these recipes promise to bring joy and a touch of magic to your kitchen.
The History and Cultural Significance
• Kitchen Witch Baking Recipes With A Magical Touch traces its origins to ancient Europe, where bakers infused their creations with local herbs and spices believed to hold protective powers.
• The dish evolved over decades as various cultures incorporated regional flavors and ingredients, eventually becoming the beloved versions we know today.
• In modern paganism and witchcraft, these baked goods traditionally appear at seasonal celebrations, symbolizing abundance and gratitude.
• While many variations exist across different cultures, the authentic versions maintain a focus on natural ingredients and the intention of the baker, setting them apart from ordinary baked goods.
Recipe Overview
Nutritional Information (per serving)
Ingredients
Essential Equipment Guide
Stand Mixer: A stand mixer is crucial for achieving the right texture in dough and batters. It ensures even mixing and aeration, which are essential for light and fluffy baked goods. Look for one with a powerful motor and various attachments for versatility.
Measuring Cups and Spoons: Accurate measurements are key in baking. Invest in a set of dry and liquid measuring cups, along with a set of measuring spoons, to ensure precision. Stainless steel or glass options are durable and easy to clean.
Baking Sheet: A sturdy baking sheet ensures even heat distribution, preventing burnt edges. Choose a heavy-duty aluminum or non-stick version for best results, and consider purchasing multiple sizes for various recipes.
Preparation Methods
Creaming Butter and Sugar: This technique is vital for achieving a light and fluffy texture in cakes and cookies. Start with softened butter and sugar, and beat them together until the mixture is pale and fluffy. This process incorporates air, which helps to leaven your baked goods.
Folding in Dry Ingredients: When combining wet and dry ingredients, gently fold them together to preserve the air you’ve incorporated. Use a spatula or wooden spoon, and cut through the mixture, bringing the dry ingredients from the bottom to the top, until just combined.
Chilling Dough: Chilling can help prevent spreading in cookies and create a better texture. Wrap your dough in plastic wrap and refrigerate for at least 30 minutes before baking.
Step 1: Prepare Ingredients

Begin by measuring out all your ingredients accurately.
This ensures a smooth baking process and prevents any surprises later on.
Make sure that your butter is softened but not melted for optimal mixing.
Gather all your utensils and equipment to minimize chaos in the kitchen.
Step 2: Cream Butter and Sugar

In a stand mixer, place the softened butter and sugar.
Beat them together on medium speed until the mixture is pale and fluffy, about 3-5 minutes.
Watch for the texture to change to a lighter consistency, indicating that air has been incorporated.
Scrape down the sides of the bowl to ensure even mixing.
Step 3: Add Eggs and Vanilla

With the mixer on low speed, add the eggs one at a time, allowing each to fully incorporate before adding the next.
Pour in the vanilla extract and mix until just combined.
The mixture should look smooth and slightly glossy, indicating proper emulsification.
Be careful not to overmix at this stage to maintain a light texture.
Step 4: Combine Dry Ingredients

In a separate bowl, whisk together the flour, baking powder, and salt until evenly distributed.
This ensures that the leavening agents are well mixed into the flour for an even rise.
Gradually add this dry mixture to the wet ingredients in the mixer.
Mix on low speed until just combined, taking care not to overwork the batter.
Step 5: Pour Batter into Pan

Prepare your baking pan by greasing it with butter or lining it with parchment paper.
Pour the batter into the prepared pan, smoothing the top with a spatula.
Make sure to spread it evenly to ensure uniform baking.
Tap the pan gently on the counter to release any air bubbles.
Step 6: Bake the Cake

Preheat your oven to 350°F (175°C) and place the pan in the center rack.
Bake for about 25-30 minutes, or until a toothpick inserted in the center comes out clean.
The top should be golden brown and slightly springy to the touch.
Avoid opening the oven door frequently to maintain temperature consistency.
Step 7: Cool the Cake

Once baked, remove the cake from the oven and let it cool in the pan for 10 minutes.
Carefully transfer the cake to a wire rack to cool completely.
Allowing it to cool fully prevents sogginess from residual heat.
This step also makes it easier to frost without damaging the cake.
Step 8: Prepare the Frosting

In a mixing bowl, combine the cream cheese, softened butter, and powdered sugar.
Beat with a hand mixer until the mixture is creamy and smooth.
Add the vanilla extract and mix until fully incorporated.
Taste and adjust sweetness if necessary by adding more powdered sugar.
Step 9: Frost the Cake

Once the cake is completely cooled, place it on a serving plate.
Use a spatula to spread the frosting evenly over the top and sides of the cake.
Consider using a piping bag for a decorative touch on the edges.
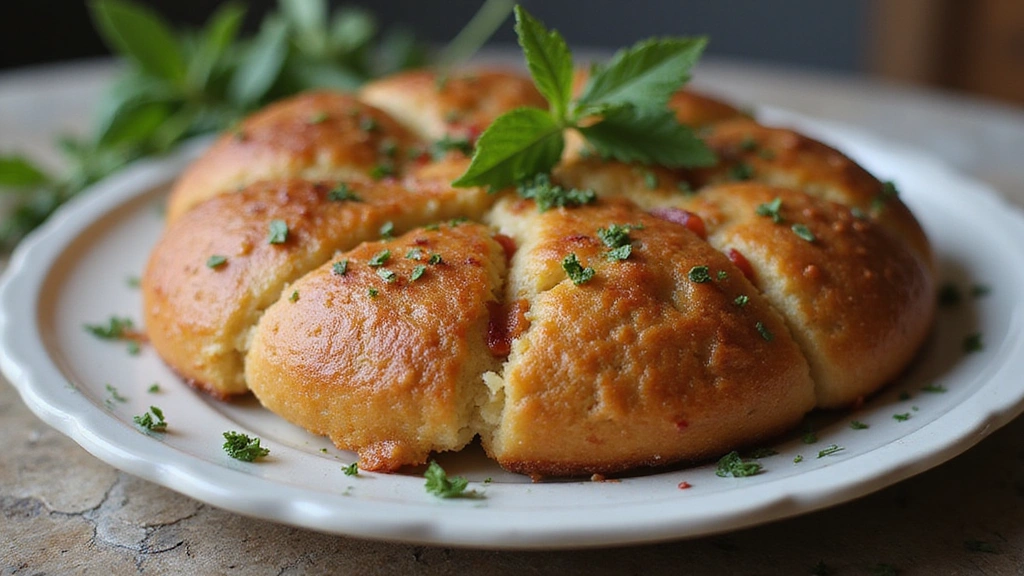
Sprinkle the edible glitter and fresh herbs on top for the magical touch.
Step 10: Serve and Enjoy

Slice the cake into equal pieces using a sharp knife.
Serve each slice on a decorative plate, possibly with a side of whipped cream or fruit.
Encourage your guests to savor the flavors and enjoy the magical experience.
Take a moment to appreciate your creation and the joy it brings to others.
Critical Timing and Temperature Guide
Baking the Cake: Bake at 350°F (175°C) for 25-30 minutes. Cake is done when a toothpick inserted in the center comes out clean. Avoid overbaking, which can lead to a dry texture.
Cooling the Cake: Cool in the pan for 10 minutes, then transfer to a wire rack. Complete cooling is essential to prevent frosting from melting. A warm cake can result in a soggy frosting layer.
Frosting Preparation: Ensure butter and cream cheese are at room temperature before mixing. This helps achieve a smooth, creamy texture. Cold ingredients can lead to lumps and uneven consistency.
Pro Tips for Kitchen Witch Baking Recipes With A Magical Touch
• Ingredient Selection: Use high-quality vanilla extract and unsalted butter for a richer flavor profile.
• Preparation Secret: Allow your eggs and butter to come to room temperature for a smoother batter.
• Temperature Management: Preheat your oven thoroughly to avoid uneven baking.
• Texture Enhancement: Sift your flour before measuring to achieve a lighter cake.
• Flavor Layering: Add spices like cinnamon or nutmeg to enhance the warmth of your cake.
• Make-Ahead Strategies: Bake the cake a day in advance and store it wrapped in plastic to allow flavors to meld.
• Restaurant-Quality Finishing Touches: Use a cake comb for decorative frosting patterns.
• Equipment Optimization: Ensure your mixer is clean and dry for optimal aeration.
Troubleshooting Common Issues
• Texture Too Dense: This may be caused by overmixing the batter. To avoid this, mix until just combined and use room temperature ingredients.
• Flavors Unbalanced: If your cake lacks flavor, consider adjusting the vanilla or adding a pinch of salt. Taste the batter before baking to make necessary adjustments.
• Cake Sinking in the Middle: This can happen if the cake is underbaked. Ensure you bake until a toothpick comes out clean.
• Frosting Too Runny: If your frosting is too thin, add more powdered sugar gradually until reaching the desired consistency.
• Crust Too Hard: This can happen from overbaking. Keep an eye on your cake during the last few minutes of baking.
Variations and Regional Differences
• Italian Version (Torta della Storia): This version uses almond flour and adds orange zest for a unique flavor. It’s often served during family gatherings in Italy.
• Spiced Pumpkin Variation: A seasonal favorite, this variation incorporates pumpkin puree and warming spices, perfect for autumn celebrations.
• Chocolate Cake Variation: Replace a portion of the flour with cocoa powder for a rich chocolate version, often enjoyed on birthdays and special occasions.
• Modern Interpretations: Incorporate gluten-free alternatives or alternative sweeteners for a contemporary twist that caters to modern dietary preferences.
Food Science Behind the Recipe
• Creaming: This process incorporates air into the butter and sugar mixture, which is essential for leavening cakes and cookies, producing a light texture.
• Emulsification: The eggs in the recipe help to bind ingredients together, creating a stable batter that holds its shape while baking.
• Maillard Reaction: This chemical reaction occurs during baking, giving the cake its golden-brown color and complex flavors, enhancing the overall taste.
Frequently Asked Questions
What’s the most common mistake people make when preparing Kitchen Witch Baking Recipes? The most common mistake is overmixing the batter, which can lead to dense baked goods. Mix until just combined to avoid this.
Can I prepare components of this dish in advance? Yes, you can bake the cake a day ahead and keep it wrapped tightly in plastic wrap to maintain moisture.
How do I adapt this recipe for dietary restrictions? Substitute gluten-free flour for all-purpose flour and use dairy-free butter for a gluten-free and dairy-free version.
What’s the best way to store and reheat leftovers? Store leftover cake in an airtight container at room temperature for up to 3 days. Reheat slices in a microwave for a few seconds to enjoy a warm treat.
Can I freeze this dish? Yes, you can freeze the baked cake. Wrap it tightly in plastic wrap and then in foil. Thaw in the refrigerator before serving.
What wine or beverages pair best with this dish? A light sparkling wine or a cup of herbal tea complements the cake beautifully, enhancing the flavors.
How can I scale this recipe up for a crowd? Double the ingredients while ensuring your baking pan is large enough, or bake in batches to accommodate the increase in volume.
What side dishes complement this recipe best? Fresh fruit, whipped cream, or a scoop of vanilla ice cream serve as delightful accompaniments.
How do professional chefs elevate this dish for restaurant service? Professional chefs often use layered designs and edible flowers for garnishing, enhancing visual appeal and elegance.
Serving and Presentation Guide
• Traditional Presentation: Serve the cake on a decorative cake stand, garnished with fresh flowers and a dusting of powdered sugar for an elegant touch.
• Modern Plating Ideas: Slice the cake and plate it alongside a dollop of whipped cream and a sprig of mint for a contemporary look.
• Accompaniment Suggestions: Pair with a scoop of vanilla ice cream or fresh berries to create a satisfying dessert experience.
• Special Occasion Presentation: For celebrations, use a tiered cake stand and adorn with seasonal fruits and edible glitter to create a festive atmosphere.
Conclusion
Baking with a magical touch can transform ordinary moments into extraordinary experiences.
I encourage you to try these Kitchen Witch Baking Recipes and see the magic unfold in your own kitchen.
May each bite bring joy and a sprinkle of enchantment to your gatherings.


