
DIY baking mixes are a life-saver for busy households, allowing you to whip up delicious treats without the hassle of measuring every ingredient from scratch.
The convenience of having pre-measured ingredients at your fingertips means you can spend more time enjoying your creations and less time in the kitchen.
I fell in love with the idea of DIY baking mixes when I first encountered them at a farmer’s market, where local bakers shared their beloved blends.
Whether you’re preparing for a last-minute gathering or simply want to indulge in homemade goodies, these mixes deliver simplicity and flavor that everyone will appreciate.
The History and Cultural Significance
• DIY baking mixes trace their origins to the early 20th century during the rise of convenience foods, which aimed to simplify cooking for busy families.
• The concept evolved as more home bakers sought ways to replicate favorite recipes without the need for extensive preparation, leading to the creation of pre-packaged mixes.
• In American culture, these mixes became staples in households, especially during the holiday season, symbolizing warmth, comfort, and the joy of sharing baked goods with loved ones.
• While many variations exist today, authentic DIY baking mixes maintain the essence of traditional baking while providing a modern twist in convenience.
Recipe Overview
Nutritional Information (per serving)
Ingredients
Essential Equipment Guide
Mixing Bowl: A sturdy mixing bowl is essential for combining dry ingredients effectively. Look for a bowl that has a non-slip base and is large enough to accommodate all your ingredients without spilling.
Whisk: A good whisk is important for aerating your dry mix and ensuring even distribution of ingredients. Consider a stainless steel whisk for durability and ease of cleaning.
Measuring Cups and Spoons: Accurate measuring tools are crucial for consistent results. Opt for clear measuring cups with measurement markings for both liquid and dry ingredients.
Preparation Methods
Mixing Dry Ingredients: Properly mixing dry ingredients is critical to ensure even distribution of leavening agents. Use a whisk to aerate the flour and to break up any clumps before combining other ingredients.
Storing Baking Mix: Proper storage extends the shelf life of your baking mix. Use airtight containers to keep moisture out and store in a cool, dry place to maintain freshness.
Customizing Your Mix: Adding personal touches to your baking mix can elevate the flavor. Consider incorporating spices like cinnamon or nutmeg, or using different types of chocolate for variety.
Step 1: Prepare Ingredients

Gather all your dry ingredients in one place for easy access.
Make sure to measure each ingredient accurately to ensure the best results.
Sift the flour and baking powder together to remove any lumps.
This step improves the texture of your final baked goods.
Step 2: Mix Dry Ingredients

In a large mixing bowl, combine the flour, sugar, baking powder, baking soda, and salt.
Use a whisk to blend the ingredients thoroughly, ensuring even distribution.
Look for an even color throughout the mixture, which indicates proper mixing.
This step is crucial for achieving consistent results in your baking.
Step 3: Add Custom Ingredients

Once the dry ingredients are well mixed, add any custom ingredients like chocolate chips or nuts.
Gently fold these additions into the dry mix to avoid breaking them.
Ensure that the custom ingredients are evenly distributed throughout the mix.
This creates a delightful surprise in every bite of your baked goods.
Step 4: Store the Mixture

Transfer the completed baking mix into airtight containers for storage.
Label each container with the contents and the date to keep track of freshness.
Store in a cool, dry place to maximize shelf life.
Proper storage ensures your baking mix remains effective for future use.
Step 5: Baking Instructions

When ready to bake, preheat your oven according to the recipe you plan to use.
In a separate bowl, combine wet ingredients like eggs and milk as specified.
Gradually mix the wet ingredients into the dry baking mix until just combined.
Avoid overmixing to ensure your baked goods remain tender.
Step 6: Pour into Baking Dish

Grease your baking dish or line it with parchment paper for easy removal.
Pour the batter evenly into the prepared dish, smoothing the top with a spatula.
Leave some space at the top as the batter will rise during baking.
This technique ensures even baking and prevents overflow.
Step 7: Bake

Place the baking dish in the preheated oven, ensuring proper spacing for even heat circulation.
Set a timer according to the recipe’s baking time.
Check for doneness by inserting a toothpick into the center; it should come out clean.
This step is critical for achieving perfectly baked goods.
Step 8: Cool and Serve

Once baked, remove the dish from the oven and let it cool for a few minutes.
Transfer to a wire rack to cool completely before slicing.
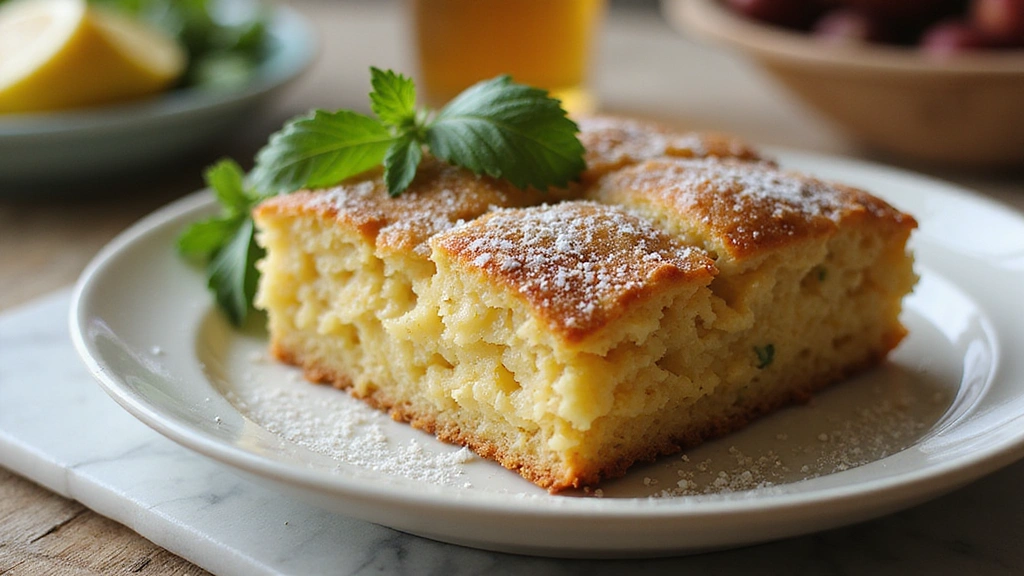
Serve warm or at room temperature, garnishing as desired.
This final step enhances the flavor and presentation of your baked goods.
Critical Timing and Temperature Guide
Baking Time: Follow the recommended baking time in your recipe, checking for doneness a few minutes prior to avoid overbaking. Look for a golden-brown color and a toothpick that comes out clean.
Cooling Time: Allow baked goods to cool in the pan for 10-15 minutes before transferring to a wire rack. This prevents sogginess and allows for even texture.
Storage Temperature: After baking, store leftovers at room temperature in an airtight container for up to 3 days. For longer storage, consider refrigerating or freezing.
Pro Tips for Diy Baking Mix Recipes To Save Time And Money
• Ingredient Selection: Use high-quality flour and sugar for the best flavor and texture in your baked goods.
• Preparation Secret: Consider chilling your wet ingredients before mixing to enhance the final texture.
• Temperature Management: Ensure your oven is fully preheated before baking, as this affects rising and cooking time.
• Texture Enhancement: Adding a small amount of cornstarch to your flour can yield a lighter texture.
• Flavor Layering: Use vanilla extract and a sprinkle of salt to enhance the overall flavor profile.
• Make-Ahead Strategies: Prepare your mixes in bulk and store them for quick access on busy days.
• Restaurant-Quality Finishing Touches: A dusting of powdered sugar or a drizzle of icing can elevate the presentation.
• Equipment Optimization: Utilize a stand mixer for ease during the mixing process, especially for larger batches.
Troubleshooting Common Issues
• Texture Too Dense: This can result from overmixing or using too much flour. Ensure you measure flour correctly and mix just until combined for light, airy baked goods.
• Flavor Unbalanced: If your treats taste bland, consider adding more salt or vanilla. A pinch of salt enhances sweetness and overall flavor.
• Baking Unevenly: This may happen if the oven temperature is incorrect. Use an oven thermometer to check accuracy and adjust as needed.
• Mix Not Rising: Check if your baking powder and soda are fresh. They should bubble when added to wet ingredients; if not, replace them.
• Baked Goods Sticking: Make sure to grease your pans adequately or use parchment paper to prevent sticking during removal.
• Too Sweet: If your mix turns out too sweet, adjust the sugar in future batches based on your taste preferences.
Variations and Regional Differences
• Chocolate Chip Cookie Mix: A popular variation includes adding cocoa powder to the flour mix for a chocolatey twist.
• Gluten-Free Mix: Substitute all-purpose flour with a gluten-free blend for those with dietary restrictions, ensuring to adjust the leavening agents accordingly.
• Spiced Pumpkin Mix: In the fall, consider incorporating pumpkin puree and spices like cinnamon and nutmeg for a seasonal flavor.
• Modern Interpretations: Today, many bakers are experimenting with alternative sweeteners and flours, such as coconut flour or agave syrup, to cater to health trends.
Food Science Behind the Recipe
• Leavening Agents: Baking powder and baking soda create carbon dioxide when activated, which helps baked goods rise and become fluffy. Understanding their function is key to achieving the right texture.
• Gluten Development: The way you mix your ingredients affects gluten formation. Light mixing promotes tenderness, while overmixing develops gluten, leading to denser baked goods.
• Sugar’s Role: Sugar not only sweetens but also influences moisture retention and browning. Its caramelization during baking contributes to flavor and color.
Frequently Asked Questions
What’s the most common mistake people make when preparing DIY baking mixes? The most common mistake is overmixing the batter, which leads to tough baked goods. Mix just until ingredients are combined for best results.
Can I prepare components of this dish in advance? Yes, you can prepare the dry mix in advance and store it in an airtight container for several weeks.
How do I adapt this recipe for dietary restrictions? For gluten-free options, replace all-purpose flour with a gluten-free flour blend using a 1:1 ratio and adjust leavening agents accordingly.
What’s the best way to store and reheat leftovers? Store leftovers in an airtight container at room temperature for up to 3 days or refrigerate for longer freshness. Reheat in the oven for best texture.
Can I freeze this dish? Yes, you can freeze baked goods for up to 3 months. Thaw in the refrigerator overnight before reheating.
What wine or beverages pair best with this dish? A light, fruity wine like Moscato complements sweet baked goods beautifully, enhancing the overall tasting experience.
How can I scale this recipe up for a crowd? Simply multiply the ingredients by the number of servings needed, ensuring to adjust baking time based on the size of the dish used.
What side dishes complement this recipe best? Fresh fruit or a scoop of vanilla ice cream pairs wonderfully with baked goods, enhancing their sweetness.
How do professional chefs elevate this dish for restaurant service? Chefs often add gourmet finishing touches like flavored syrups, fresh fruits, or elegant plating techniques to enhance presentation.
Serving and Presentation Guide
• Traditional Presentation: Serve your baked goods on a rustic wooden platter, garnished with fresh fruit or a dusting of powdered sugar for an inviting look.
• Modern Plating Ideas: Consider individual servings on white plates, with a drizzle of sauce or a scoop of ice cream to modernize the presentation.
• Accompaniment Suggestions: Pair your baked treats with a dollop of whipped cream or a scoop of ice cream for a delightful experience.
• Special Occasion Presentation: For celebrations, use decorative serving dishes and add fresh flowers or themed garnishes to create an impressive display.
Conclusion
DIY baking mixes are a fantastic way to simplify your baking process while saving time and money.
With just a few simple ingredients and steps, you can create delightful treats that will impress friends and family.
I encourage you to try making your own mixes and customize them to your taste preferences.
Happy baking!


