Apple Baker Baking Dish Recipes bring a delightful warmth and nostalgia to any kitchen.
The sweet and tart flavors of fresh apples combined with comforting spices create a dish that feels like a cozy embrace.
I first tasted these baked apple dishes during a crisp autumn festival, where the aroma of cinnamon and baked goods filled the air.
Perfect for family gatherings or a quiet evening at home, these recipes are easy to prepare and offer incredible results that will impress everyone at your table.
The History and Cultural Significance
• Apple Baker Baking Dish Recipes trace their origins to Europe, where they were originally created by home cooks in the 17th century.
• The dish evolved over decades as different apple varieties became available, eventually becoming the beloved versions we know today.
• In many cultures, baked apple dishes traditionally appear at harvest festivals, symbolizing gratitude for the bounty of the season.
• While many variations exist across different regions, the authentic version maintains a balance of sweet and tart flavors that sets it apart from imitations.
Recipe Overview
Nutritional Information (per serving)
Ingredients
Essential Equipment Guide
Apple Corer: This tool is essential for quickly and evenly removing the core from apples. Look for a sturdy stainless steel model that makes the job easy and safe.
Baking Dish: A good quality baking dish ensures even cooking and browning. Choose one made of glass or ceramic for best results, and consider the size based on the number of servings.
Mixing Bowl: A large mixing bowl is crucial for combining your ingredients effectively. Opt for a non-slip design to keep it steady while mixing.
Preparation Methods
Core and Slice Apples: Start by using an apple corer to remove the cores from your apples. This ensures even cooking and makes for a pleasant eating experience. Slice the apples into even wedges for the best texture in the final dish.
Make the Topping: In a mixing bowl, combine oats, flour, sugar, and salt. Use your hands or a pastry cutter to incorporate melted butter until the mixture resembles coarse crumbs. This will create a delightful topping with a crunch.
Layering the Dish: Begin with the apple mixture at the bottom of your baking dish, then evenly distribute the topping over the apples. This layering method ensures the apples cook through while the topping crisps up perfectly.
Step 1: Prepare Ingredients

Start by gathering all your ingredients on the countertop.
Make sure to peel and core the apples before slicing them into thin wedges.
This ensures even cooking and makes for a pleasant presentation.
Organizing your ingredients will make the preparation process smoother.
Step 2: Core and Slice Apples

Using an apple corer, remove the cores from all the apples.
Ensure that you cut the apples into even wedges to promote uniform cooking.
Aim for slices that are about 1/4 inch thick.
This technique is key to achieving the right texture in the final dish.
Step 3: Mix Filling Ingredients

In a large mixing bowl, combine the sliced apples with brown sugar, cinnamon, nutmeg, and lemon juice.
Toss the mixture gently until the apples are well coated.
This step builds the flavor base that will infuse during baking.
Make sure the sugar is evenly distributed among the apples.
Step 4: Prepare the Topping

In a separate mixing bowl, combine oats, flour, granulated sugar, and salt.
Melt the butter and pour it into the dry mixture, stirring until it resembles coarse crumbs.
This will create a crunchy topping that contrasts nicely with the soft apples.
Make sure there are no large lumps of butter in the mixture.
Step 5: Layer the Apples

Pour the apple mixture into the bottom of your prepared baking dish.
Spread it evenly to ensure all slices are exposed to the heat.
This will allow for even cooking and caramelization of the apples.
Be sure to press down gently to create a compact layer.
Step 6: Add the Topping

Take the prepared topping and sprinkle it evenly over the apple layer.
Use your fingers to break up any large clumps for better distribution.
This ensures that every bite will have that delicious crunchy topping.
Make sure to cover the apples completely to prevent burning.
Step 7: Bake the Dish

Preheat your oven to 350°F (175°C) before placing the baking dish inside.
Bake for approximately 45 minutes or until the apples are tender and the topping is golden brown.
You can check for doneness by inserting a fork into the apples; they should be soft.
Keep an eye on the topping to prevent it from over-browning.
Step 8: Cool and Serve

Once baked, remove the dish from the oven and let it cool for about 10 minutes.
This allows the juices to settle and makes serving easier.
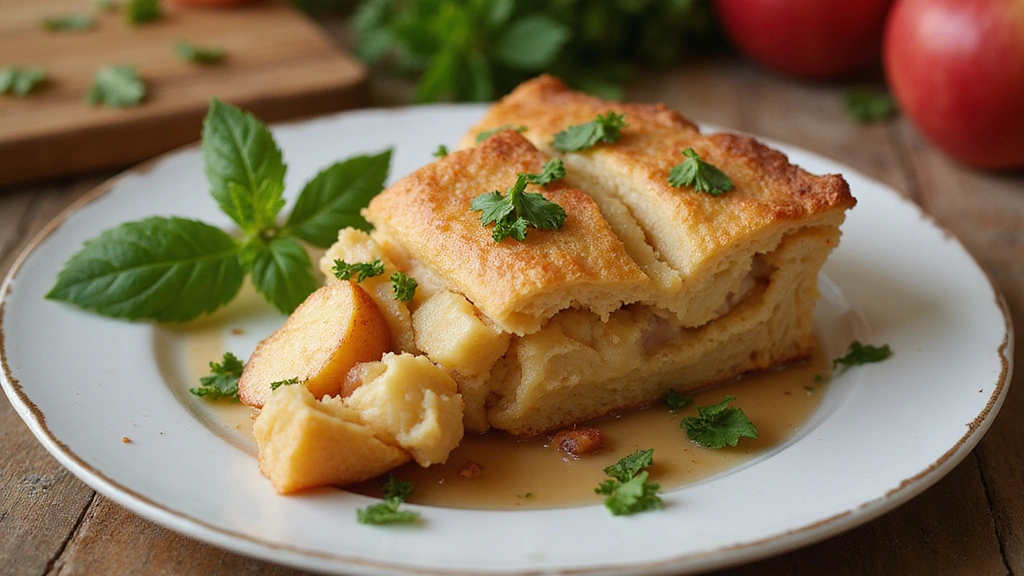
Serve warm with a scoop of vanilla ice cream or whipped cream for a delightful contrast.
Consider garnishing with fresh mint for a pop of color.
Critical Timing and Temperature Guide
Apple Baking: Bake at 350°F (175°C) for 45 minutes. The apples should be fork-tender, and the topping should be golden brown. Common mistakes include underbaking, which leaves the apples crunchy, or overbaking, which can dry out the topping.
Cooling Time: Allow the dish to cool for 10 minutes before serving. This helps the filling set and makes it easier to serve without falling apart. Rushing this step may lead to a messy presentation.
Storage Temperature: Store any leftovers in an airtight container in the refrigerator. Ensure the dish is completely cooled to prevent condensation, which can make the topping soggy.
Pro Tips for Apple Baker Baking Dish Recipes That Taste Amazing
• Ingredient Selection: Choose fresh, firm apples like Granny Smith or Honeycrisp for optimal flavor and texture.
• Preparation Secret: Tossing the apple slices with lemon juice not only enhances flavor but also prevents browning during prep.
• Temperature Management: Ensure your butter is melted but not hot when mixing the topping to achieve the perfect crumbly texture.
• Texture Enhancement: For an even crunchier topping, consider adding chopped nuts or coconut flakes to the mix.
• Flavor Layering: Try adding a hint of vanilla extract to the apple filling for an extra depth of flavor.
• Make-Ahead Strategies: Prepare the filling and topping separately a day in advance and assemble just before baking.
• Restaurant-Quality Finishing Touches: Drizzle with caramel sauce right before serving for an elegant touch.
• Equipment Optimization: Use a glass baking dish to monitor the browning of the topping more easily.
Troubleshooting Common Issues
• Texture Too Dense: This can occur from too much flour in the topping. Ensure you measure accurately and consider sifting the flour for a lighter texture.
• Flavors Unbalanced: If the dish tastes too sweet, add a bit more lemon juice to brighten it. Taste the apple mixture before baking to adjust flavors.
• Topping Burned: If the topping is browning too quickly, cover the dish loosely with aluminum foil for the last 15 minutes of baking.
• Apples Not Softening: If the apples are still hard after baking, they may need more time. Check every 5 minutes until tender.
• Too Soggy: This can happen if the apples release too much juice. To prevent this, toss apples with a tablespoon of cornstarch before adding to the baking dish.
Variations and Regional Differences
• German Apfelstrudel: This variation features thin layers of pastry wrapped around spiced apples and raisins, offering a different texture and presentation.
• American Apple Crisp: Instead of a crumbly topping, this version uses a combination of oats and brown sugar for a heartier finish, often served with whipped cream.
• French Tarte Tatin: A caramelized upside-down apple tart that showcases the apples in a different way, highlighting their natural sweetness.
• Modern Interpretations: Contemporary adaptations might include gluten-free flour substitutes or vegan butter to cater to dietary preferences while maintaining flavor.
Food Science Behind the Recipe
• Caramelization: The sugars in the apples and brown sugar will caramelize during baking, creating rich flavors and a golden color. Understanding this process helps you time baking accurately for the best results.
• Maillard Reaction: This occurs between amino acids and reducing sugars during baking, contributing to the savory, complex flavors in the topping. A proper temperature helps maximize this effect.
• Emulsification: Mixing melted butter with dry ingredients helps to evenly distribute fat throughout the topping, leading to the ideal crumbly texture.
Frequently Asked Questions
What’s the most common mistake people make when preparing Apple Baker Baking Dish Recipes? The top mistake is overmixing the topping, which can lead to a dense texture rather than a light, crumbly one. Stir until just combined.
Can I prepare components of this dish in advance? Yes, you can prepare the apple filling and topping a day ahead and store them separately in the refrigerator. Assemble them right before baking.
How do I adapt this recipe for dietary restrictions? To make it gluten-free, substitute all-purpose flour with a gluten-free blend, and for vegan options, replace butter with coconut oil or a vegan butter alternative.
What’s the best way to store and reheat leftovers? Store in an airtight container in the refrigerator for up to 3 days. Reheat in the oven at 350°F until warmed through for the best texture.
Can I freeze this dish? Absolutely! Freeze before baking. Thaw in the refrigerator overnight before baking as directed, adding a few extra minutes if needed.
What wine or beverages pair best with this dish? A sweet dessert wine like Riesling or a spiced cider works beautifully with the flavors in the dish.
How can I scale this recipe up for a crowd? Simply double the ingredients and use a larger baking dish, adjusting the baking time as necessary to ensure even cooking.
What side dishes complement this recipe best? Vanilla ice cream or whipped cream are classic accompaniments that balance the sweetness of the apples.
How do professional chefs elevate this dish for restaurant service? They might add a scoop of crème fraîche or a sprinkle of sea salt to enhance the dish’s complexity and flavor.
Serving and Presentation Guide
• Traditional Presentation: Serve the baked apple dish directly from the baking dish, topped with a scoop of vanilla ice cream and a dusting of powdered sugar for a classic look.
• Modern Plating Ideas: Plate individual servings on rustic wooden boards with garnishes of fresh herbs and a drizzle of caramel for a trendy touch.
• Accompaniment Suggestions: Pair with a simple side salad or spiced nuts for a delightful contrast in flavors and textures.
• Special Occasion Presentation: For festive gatherings, consider serving in individual ramekins, topped with a sprig of mint and a scoop of sorbet for a refreshing finish.
Conclusion
I hope you find joy in making this Apple Baker Baking Dish recipe as much as I do.
The combination of flavors and textures creates a dish that brings people together.
Don’t hesitate to experiment with your favorite ingredients to make it your own.
Happy baking!